- Trang chủ
- ›
- Cách lấy IP thật khi sử dụng CloudFlare với Nginx/Apache
Cách lấy IP thật khi sử dụng CloudFlare với Nginx/Apache
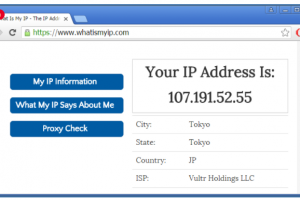
Cách lấy IP thật khi sử dụng CloudFlare với Nginx/Apache sẽ được chúng tôi hướng dẫn chi tiết sau đây. CloudFlare hoạt động như một reverse proxy, do đó toàn bộ kết nối tới server của bạn sẽ hiển thị với IP của CloudFlare.

Cách lấy IP thật khi sử dụng CloudFlare với Nginx/Apache
Mở file cấu hình Nginx, thường có đường dẫn /etc/nginx/nginx.conf và đặt đoạn cấu hình Nginx real IP module sau trong block http { }.
Dưới đây là danh sách IP được update tại CloudFlare IP Ranges:
set_real_ip_from 103.21.244.0/22;
set_real_ip_from 103.22.200.0/22;
set_real_ip_from 103.31.4.0/22;
set_real_ip_from 104.16.0.0/12;
set_real_ip_from 108.162.192.0/18;
set_real_ip_from 131.0.72.0/22;
set_real_ip_from 141.101.64.0/18;
set_real_ip_from 162.158.0.0/15;
set_real_ip_from 172.64.0.0/13;
set_real_ip_from 173.245.48.0/20;
set_real_ip_from 188.114.96.0/20;
set_real_ip_from 190.93.240.0/20;
set_real_ip_from 197.234.240.0/22;
set_real_ip_from 198.41.128.0/17;
set_real_ip_from 199.27.128.0/21;
set_real_ip_from 2400:cb00::/32;
set_real_ip_from 2606:4700::/32;
set_real_ip_from 2803:f800::/32;
set_real_ip_from 2405:b500::/32;
set_real_ip_from 2405:8100::/32;
set_real_ip_from 2c0f:f248::/32;
set_real_ip_from 2a06:98c0::/29;
# use any of the following two
real_ip_header CF-Connecting-IP;
#real_ip_header X-Forwarded-For;
Cùng với đó chúng ta cũng cần điều chỉnh lại log_format để sử dụng tham số $http_cf_connecting_ip hoặc $http_x_forwarded_for như sau:
log_format main ‘$remote_addr – $remote_user [$time_local] $status ‘
‘”$request” $body_bytes_sent “$http_referer” ‘
‘”$http_user_agent” “$http_x_forwarded_for”‘;
Đến đây chúng ta chỉ cần Reload lại Nginx để sử dụng cấu hình mới là xong.
Danh sách IP này thỉnh thoảng cần được update, bạn có thể lấy IP mới nhất ở đây.
Cách lấy IP gốc client khi sử dụng CloudFlare với Apache
Nếu dùng Apache Webserver, bạn có thể sử dụng package có sẵn mod_cloudflare.
1. Cài đặt package cần thiết
– Red Hat/Fedora:
sudo yum install httpd-devel libtool git
– Debian/Ubuntu:
sudo apt-get install apache2-dev libtool git
2. Clone code mod_cloudflare mới nhất
git clone https://github.com/cloudflare/mod_cloudflare.git && cd mod_cloudflare
3. Compile thành module
Red Hat/Fedora/Debain/Ubuntu:
apxs -a -i -c mod_cloudflare.c
4. Restart webserver và kiểm tra lại module đã được active
– Red Hat/Fedora:
service httpd restart && httpd -M|grep cloudflare
– Debian/Ubuntu:
sudo apachectl restart; apache2ctl -M|grep cloudflare
5. Nếu web server của bạn sử dụng load balancer thì cần add thêm dòng sau vào file cấu hình Apache như sau
CloudFlareRemoteIPTrustedProxy 123.123.123.123
Xem bài liên quan:
Bài viết liên quan

Hướng dẫn cài đặt Redis trên Ubuntu
Hướng dẫn sử dụng VPS Việt Nam tạo SOCKS Proxy

Các công cụ Test tốc độ Websites uy tín 2021
Hướng dẫn nổi bật

Hướng dẫn sử dụng VPS Việt Nam tạo SOCKS Proxy
Các công cụ Test tốc độ Websites uy tín 2021
Hướng dẫn thiết lập Memcached trên Ubuntu 18.04 LTS

Cách đặt lại mật khẩu VPS Windows

Nâng cấp cURL trên DirectAdmin

Litespeed là gì ? Tất cả các điều cần biết về Litespeed